Best-Laid Pipe Part II: Creative Chasing (April 29, 2012)
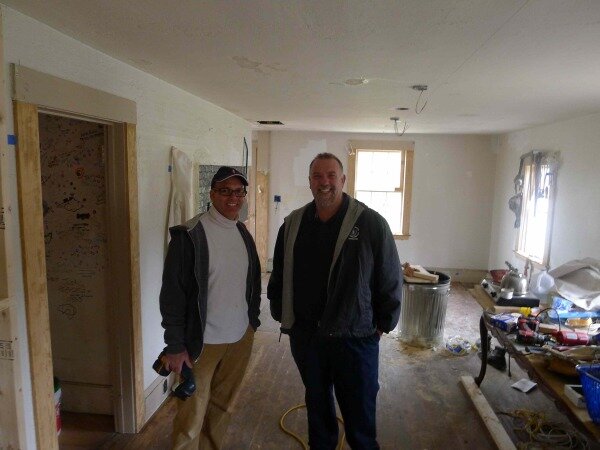
These two men in our kitchen are beaming because the one on the left—our master plumber, Greg Mahoney (978-376-9849)—just passed inspection by the one on the right—Massachusetts’ notoriously tough state plumbing inspector, Scott Padden.
Greg has come a long way since he first walked into our house last winter and wanted to run. It was his first state building, and it posed a severe challenge or two. For starters, he says the smallest sewage pipe he can run is 4½ inches, but our interior partition walls are only 2 inches thick. The house doesn’t have a “wet wall”—running from the basement to the upstairs bath to house the pipes and drains for modern appliances—because, as we know, it was built 200 years ago with outdoor plumbing. And the existing indoor plumbing, which was probably installed around 1910, was wildly out of whack with 21st-century code in the commonwealth.
To protect the structural integrity of the house, Greg and Kevin joined forces to lay new pipe through a series of soffits and chases—boxes built out from the original walls to conceal plumbing. (Soffits run horizontally, chases vertically.) Greg says without them—and without Kevin’s willingness to build them—our upstairs bath would not have happened: “Creative chasing was key to the success of this project. Without it, we would’ve put a bathroom on the first floor and called it quits.”
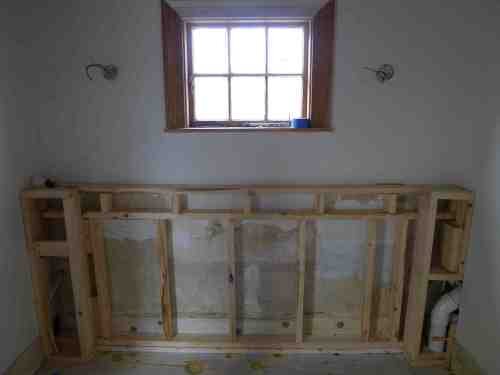
So, for example, Kevin built this surround for the tub in the master bath to house a chase for that white PVC pipe in the bottom right corner of the photo (shown in detail in the shot above it). It’s the vent for this bathroom, and it actually runs up and out of the building through the closet in the guest room.
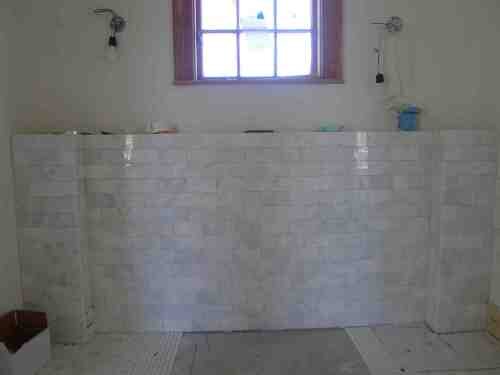
Here you can see that Kevin sealed the surround with 3/8-inch thick, 3 x 6-inch white carrara marble tiles from Tiles Gone Wild in Newburyport, MA. He’ll eventually cap the top with marble as well, creating a convenient shelf that runs along the length of the tub.
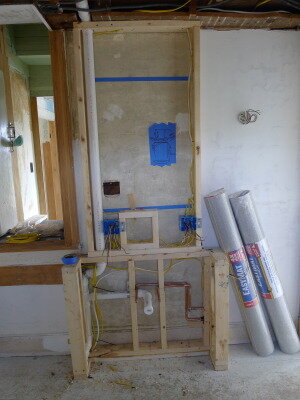
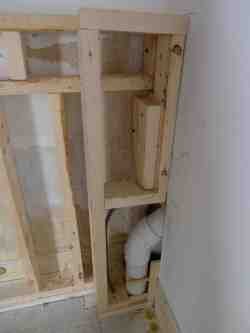
This chase will house the plumbing for our master bathroom sink. It’s the most clever and critical one, designed to circumvent the main carrying beam of the house. The beam measures about 8 x 8 inches in girth and runs parallel to the baseboard but beneath it, across the width of the house, separating the first floor from the second. It’s an important hunk of wood, and they didn’t want to cut into it—and verify the old line that the biggest termite around is a plumber with a Sawzall.

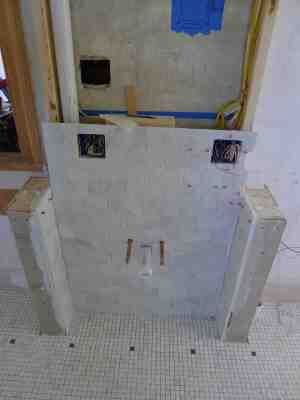
So they drew the drain pipe into the room through the floor about 8 inches out from the wall (as you can see on the left of this structure), so it clears the beam but then runs back toward the wall before ascending then making a 90-degree turn and then another, to the exact position where it will meet the sink drain once the sink itself is installed. As you can see in the photo above this one on the right, Kevin has started encasing the sink surround in marble tile as well, echoing the tub surround across the room.
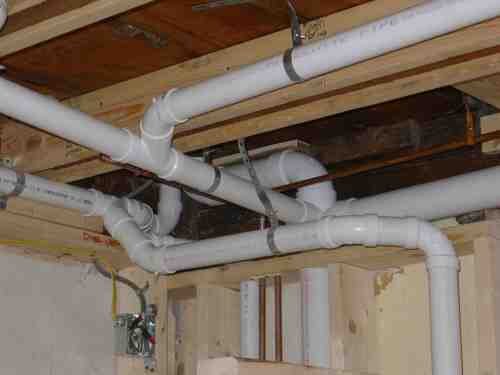
The ceiling of our downstairs bath will eventually conceal this network of pipe beneath our master bath. With it exposed, Greg was able to explain it to me (I hope you find this as fascinating as I do): Clockwise from that lowest pipe on the left, we have the first-floor bathroom vent; then the second-floor bathroom tub drain; the second-floor sink drain; the second-floor toilet drain; and the first-floor laundry vent. (For the benefit of novices like me, I should mention that vents run up and release exhaust; drains run down and release waste water and matter.) The double copper pipes in the center run the hot and cold water into the second-floor bath; the horizontal copper pipe on the right runs cold water to the toilet. That thick white vertical pipe in the center of this shot is the “main stack,” where waste exits the building, eventually into the septic tank. The one to its left is the kitchen vent.
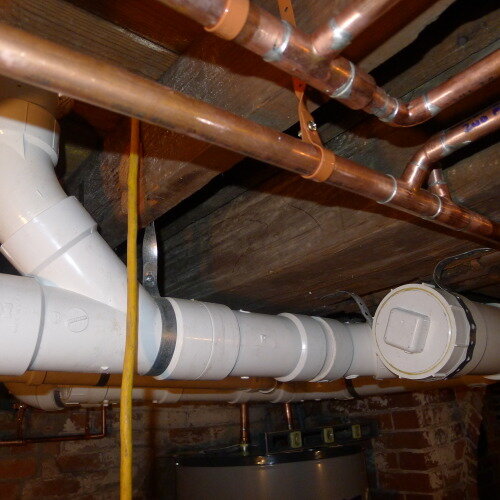
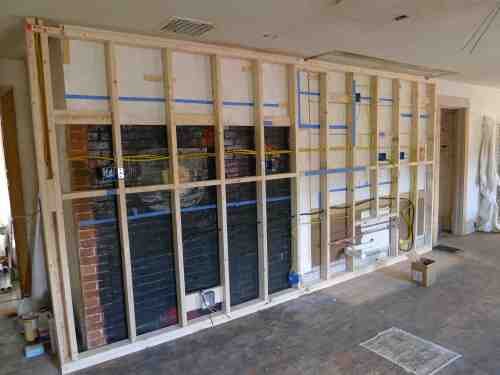
Here’s the beauty shot—the guts of this operation, in our basement. That white PVC pipe is the main drain, connected to the main stack shown above, which runs to the septic tank; the copper pipes are water lines. Greg ran copper rather than flexible PEX tubing for the water lines because he said PEX would have been outright “wavy” around our original beams. Typical of old house frames, they’re highly irregular in size, as you can see here, ranging from 2 x 6 inches to 4 x 4 to even 10 x 10—dictated by the size of wood that was available at the time, rather than some master plan or set of standards.
Greg’s training paid off in spades. To work on our house, it wasn’t enough that he’d worked under a master plumber in MA for 3 years to earn his journeyman’s license, studied for another year, and then worked in the field for a year to become a master plumber. He still had to file special permits and applications to register his corporation with the state plumbing board, to work on a state-owned building. Fortunately, Scott Padden was as impressed by his work as we were—freeing him to prepare for his next challenge: our kitchen.